Monday, September 30, 2013

TV Stand - Part IV, Wrapping up the joinery, thoughts on the glue-up.

It was a productive weekend. I was able to get the web frames built and fitted into the case and start working on making the panels for the shelves.  Those were the first panels on the list so that I can get the web frames fully assembled and glued up as soon as possible.


Trimming the notches on the back rail of the web frame turned out to be another job perfectly suited for the shoulder plane.  This is certainly becoming one of my go to tools for fine tuning joinery of all sorts.


Here is the case dry fit with everything but the drawer dividers. I think I am going to re-make the rear stiles to give them tenons like I used on the web frames.  This will facilitate glueing up the rear panel as an assembly.

Speaking of the glue-up, that has been on my mind recently.  The following images roughly outline what I have in mind for my process.  I know that the web frames and ends will be glued up as an assembly but I am not sure about the back panel.  One of my reasons for doing sub-assemblies is that it will allow me to get clamps on some parts that would be otherwise inaccessible. I plan on using Old Brown Glue for the glue-up as it will give me plenty of working time and is much easier to deal with as squeeze out.

First step will be to glue-up the sub assemblies.  I may even try and pre-finish some of these sub-assemblies, particularly the shelves.
I plan on starting by glueing the lower front stretcher and web frame into the end cap.  I am also thinking about gluing the two shelf web frames together with their dividers and panels.
Next the shelves or shelf assembly will be glued into the main assembly.
Then the rear panel assy (or pieces if I decide not to pre-assemble it) will be installed.  I may also glue the right end-cap on at the same time.
The final step will be to glue on the end-cap if it doesn't on with the back and to install the top stretcher.  I am going to keep the off-cuts when I cut the taper on the legs to use as cauls so that my clamps can be square to the case.
 Any thoughts or suggestions on the assembly process and finishing strategy would be appreciated.


Tuesday, September 24, 2013

TV Stand - Part III, it's starting to look like something.

The last couple nights have been productive. Last night I got all of the tenons cut and sized.


Tonight I finished mitering the ends of the tenons so that the adjacent ones can both fit into the shared mortise bottoms. Next up was cutting the grooves for the panels in the rails.  This was done at the router table.  I was worried that I hadn't kept the tenons centered while fitting them and would have problems with the grooves on the rails not matching up with those on the legs, but everything worked out ok.

I also got the rear stiles cut, though I may need to remake the two upper ones as I ran the groove on both edges when it is only supposed to be on one.  I am considering adding a panel to that middle opening though.  It would make the case look much cleaner from the rear but would impact access to the back of the components.  As the current design is intended to allow all of the wiring to run inside and hidden I am seriously considering the idea of just adding another panel.  It may come down to whether I can squeeze another panel out of the curly cherry board I plan to use for the drawers/panels.

The next item to tackle is the dados in the rails for the web frames.  I am still undecided whether I want to cut those on the route table with a 3/4" bit or whether I should cut them on the table saw with a dado stack.  I feel like I get much better width tolerances with the dado stack, but I won't be able cut them in one pass.  This does give me the opportunity to sneak up on the location of the lower dado (relative to the front rail) a bit.  The inevitable clean-up on the dado bottoms will also give me a good excuse to use the new router plane that is in the mail from Lee-Valley...somehow saving 12$ on shipping makes justifying the purchase of a tool much easier.

After those dados its back to milling stock. On monday I ran to the hardwood dealer at lunch to pick up a bit more cherry and some 6/4 maple that I will be re-sawing for drawer sides, and maybe for the slats.  
Speaking of re-sawing I have been trying to figure out how to handle that.  The panels that I need to cut  get up to 6 1/8" wide.  I  could probably have just squeezed that in under the bearing guides on the bandsaw.  The drawer sides for the lower drawers however, are 7 inches tall.  I started looking at the saw to determine what the limiting factor was on the height adjustment and realized that the blade guard mount takes up about an inch of adjustment.  I removed it and was able to get the blade guides high enough to cut 7 1/8" It's still going to be tight, but I think I can make it work.

I finally got around to ordering a wood-slicer blade from Highland woodworking to replace the "not as sharp as it once was" timberwolf blade that was on the saw when I bought it.

I meant to take the camera down to the shop with me a get some more pictures, tomorrow maybe.

Sunday, September 22, 2013

TV Stand - Part II, Making dust.

This weekend I dug into the pile of lumber for the tv stand.  I had already gotten the legs milled square so next up was all of the stretchers for the case.
Leg blanks on the right, pile of stretchers on the left.
The one piece of equipment that I really wish I had room for is a jointer.  Until the day I come across a deal too good to pass up and just make room for one I'm working on my upper body conditioning.  working my way through that stack of lumber above proved to be great practice.  I really do appreciate how nice cherry is to work with.
First step was to touch up the blade on the jointer.  
Next up are traversing passes with the #5.  The cambered blade makes quick work of the rough cut surface. 

Then on to the #7. 
I ended up breaking out the feeler gauges to speed things up. ..yes speed them up.  With the gauges I had a way of knowing it was flat enough and not chasing after that last tiny bit of light under the straight edge.  Went for 0.005" flatness on the faces and 0.002" on the edges.
Checking the edge to make sure its still square.
Finally done jointing.
I spent the better part of saturday getting the rest of the parts jointed.  Then it was time for a bike ride.  fall is on its way, there was some color already up high.


Today I took the dog out on the bike first thing to wear her out then it was back to the shop.

Got the router set up to cut the mortises on the legs.
One new addition the arsenal for this project was a edge guide for the router. It sure beats cutting mortises at the router table.  After one un-intended practice leg and some more milling practice I made some real progress.  I found that plunging to full depth at either end of the mortise first made things much easier.

Then it was on to finishing up the milling for the stretcher stock.  I'm not sure whether the thickness planer or the bandsaw were the best addition to the shop this year, but I'm glad I've got both of them.

The final task for the evening was to get the table-saw and bandsaw set up to cut the tenons.  Test boards fit well but I'm still not sure about cutting the tenon cheeks on the band saw.  I may end up putting the dado stack on the table saw even though it doesn't leave quite as clean a surface.


That's all for tonight.


Saturday, September 21, 2013

TV Stand - Part I the design

Now that the wedding madness is over I am able to get back into the shop and start work on a new project.  The next thing on my list is a tv stand to replace the one below.  


I have been working on the design for awhile and had originally planned to have two shelves and a drawer in the center, with cabinet doors on either side. The design always seemed a bit awkward to me and I was having issues deciding how to build the internal dividers and shelves.


Then, a couple weeks ago  I cam across a tweet from Darrell Peart of a dresser he was working on that caught my eye. As with all of Darrells pieces, the proportions are elegant and the design has a lot of interesting details. 
 I realized that I liked the look drawers all the way across better than drawers and doors.  So...back to the drawing board for me.


And this is where I ended up.  I realized that the open shelf design of the current tv stand is actually pretty useful for allowing access to the back of the components without having to pull them out. With this design in mind I headed off the lumber store last weekend and filled the car with about 50bf of charry and hard maple. two of the boards really stood out.  One has some nice curl and the other is over 10in wide and has pretty consistent sapwood down both edges which I hope to use for the top.


This past week I sent some images of the above design to Chris Wong of Flairwoodworks and one of the hosts of the weekly #Woodchat design discussion.  He invited me on to discuss the design and I got some great suggestions from he and the other guys.  Most of the suggested changes involved allowing for better air flow around the components and for better cable management.

This is the current design that I am moving forward with.  The solid shelves have been replaced with slats to allow better airflow and cords to be routed inside of the piece.
This is a photoshop mock-up of the top. The sapwood has a gentle curve on each end of the board which I am going to follow to create a cutout in the center of the table top.  This split top design will add an interesting design element to the piece as well as allowing cables from the TV to dive straight through the top, eliminating the need for any cables to wrap around the back of the cabinet.


Friday, September 20, 2013

Record Case Part IV - Followup..

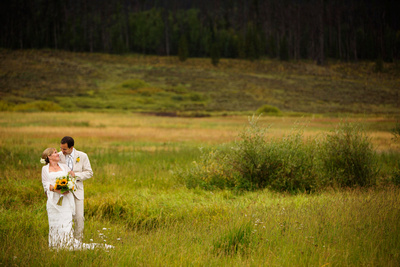
Its been a pretty crazy month with the final wedding prep and all the craziness of the weeks around the wedding.  Everything came off to plan which was pretty amazing.  For those of you who were there and are looking for pictures, here is the link for the pics from the photographer. Our photographer, Shelley Coar, was awesome.  We would highly recommend her for both her skills as a photographer and for being great to work with.

Shelley Coar Photography: Family & Bridal Party &emdash;

Our DJ did a great job and was stoked on the record case.  He sent me some action shots of it.


We just picked up a new camera.  After looking at the Olympus tough cameras we decided that we really didn't need a waterproof camera and would rather get something that would take amazing pictures.  I have been thinking about going the micro four-thirds route for awhile and that is what we ended up with.  After spending too many hours reading camera reviews we settled on the Olypmus E-PL5...so far I am really impressed, particularly considering all of these shots are with the basic kit lens.

Frank enjoying the nice weather.
Great light in the morning with some light rain.
Wicket is awfully proud of herself.
Out taking pictures at lunch trying to learn how to use the new camera.
Testing out the fill flash.
I am impressed with how sharp the pictures are from this camera. 

Great color the other morning.
Enjoying some with from Lake Co CA.  
A present from my parents mounted on a pieces of mahogany, finally figured out a decent color match for the kitchen cabinets.


Here is a sneak preview of the next project in the works.  I have been making the best of Natalie being out a town to get into the shop and start working on the TV stand above. 


That's all for tonight.