Showing posts with label Sketching. Show all posts

Tuesday, October 6, 2015

Linen Pantry


Natalie wanted a linen cupboard for the guest bathroom.


We found some examples of shaker style cupboards that she liked.


I drew some quick plans and rounded up some material, poplar lumber and birch plywood.


A few hours with the track saw and a couple dozen dominos later, I had a case.


Poplar bead board made the door panels.


After glueing everything up I installed the hardware and trimmed the door to fit.


A little filler and it was time for some milk paint.


Milk paint was an interesting experience.  After a couple tries I got a decent mix.  I found that mixing the powder  into a thick paste first helped.  Then I could thin it down and let it sit overnight.  Straining the mix before application helped.


Once the painting was complete I set up out on the deck and sprayed  few coats of shellac to give the paint a bit more depth and protection.


Wednesday, August 20, 2014

Cherry Bookcase - Design and construction.

Earlier this year a friend asked if I would be willing to build a bookcase for her.  She has an old bookcase in a hallway and wants to replace it, though she couldn't find something shallow enough. We talked over what she was looking for and I did some sketching.


After getting feedback on the sketches I built a quick sketchup model.


This let us play with thicknesses. We decided to go with 5/4 material for the case so the top would finish out to 1 1/8 and the sides 7/8.  The shelves are finished at 3/4 from 4/4 material.  We met up at lunch and went over to CS Woods in Denver.

They have a good inventory or really nice, unsteamed cherry.  These boards were tempting but way too wide for this project (18-24 in wide, 5/4).  


First up was to get the stock broken down and milled close to final size.  I finally found a good deal on a small jointer on Craigslist.  Some handwork we still required as the 6in jointer only got 2/3 of the wider boards.


Then the case boards and shelves were cut to final size.  I clamped them all together to get an idea of how the different thicknesses worked with one another.


After cutting all of the joinery with the domino I cut the profile on the underside of the top.


Finally the case was ready for a full dry fit.


Next up is the skirt.  Here is one option for an arch, layed out in blue tape.


The side skirts are cut from the same board so the grain will wrap around the case.


The corners of the skirt and chamfered and joined with a small domino.


The back edges of the case pieces were rabbeted to accept the back.

All that's left is to get feedback on the edge treatment for the front of the shelves and then sand everything before glueup.


Tuesday, March 25, 2014

Drawing Furniture

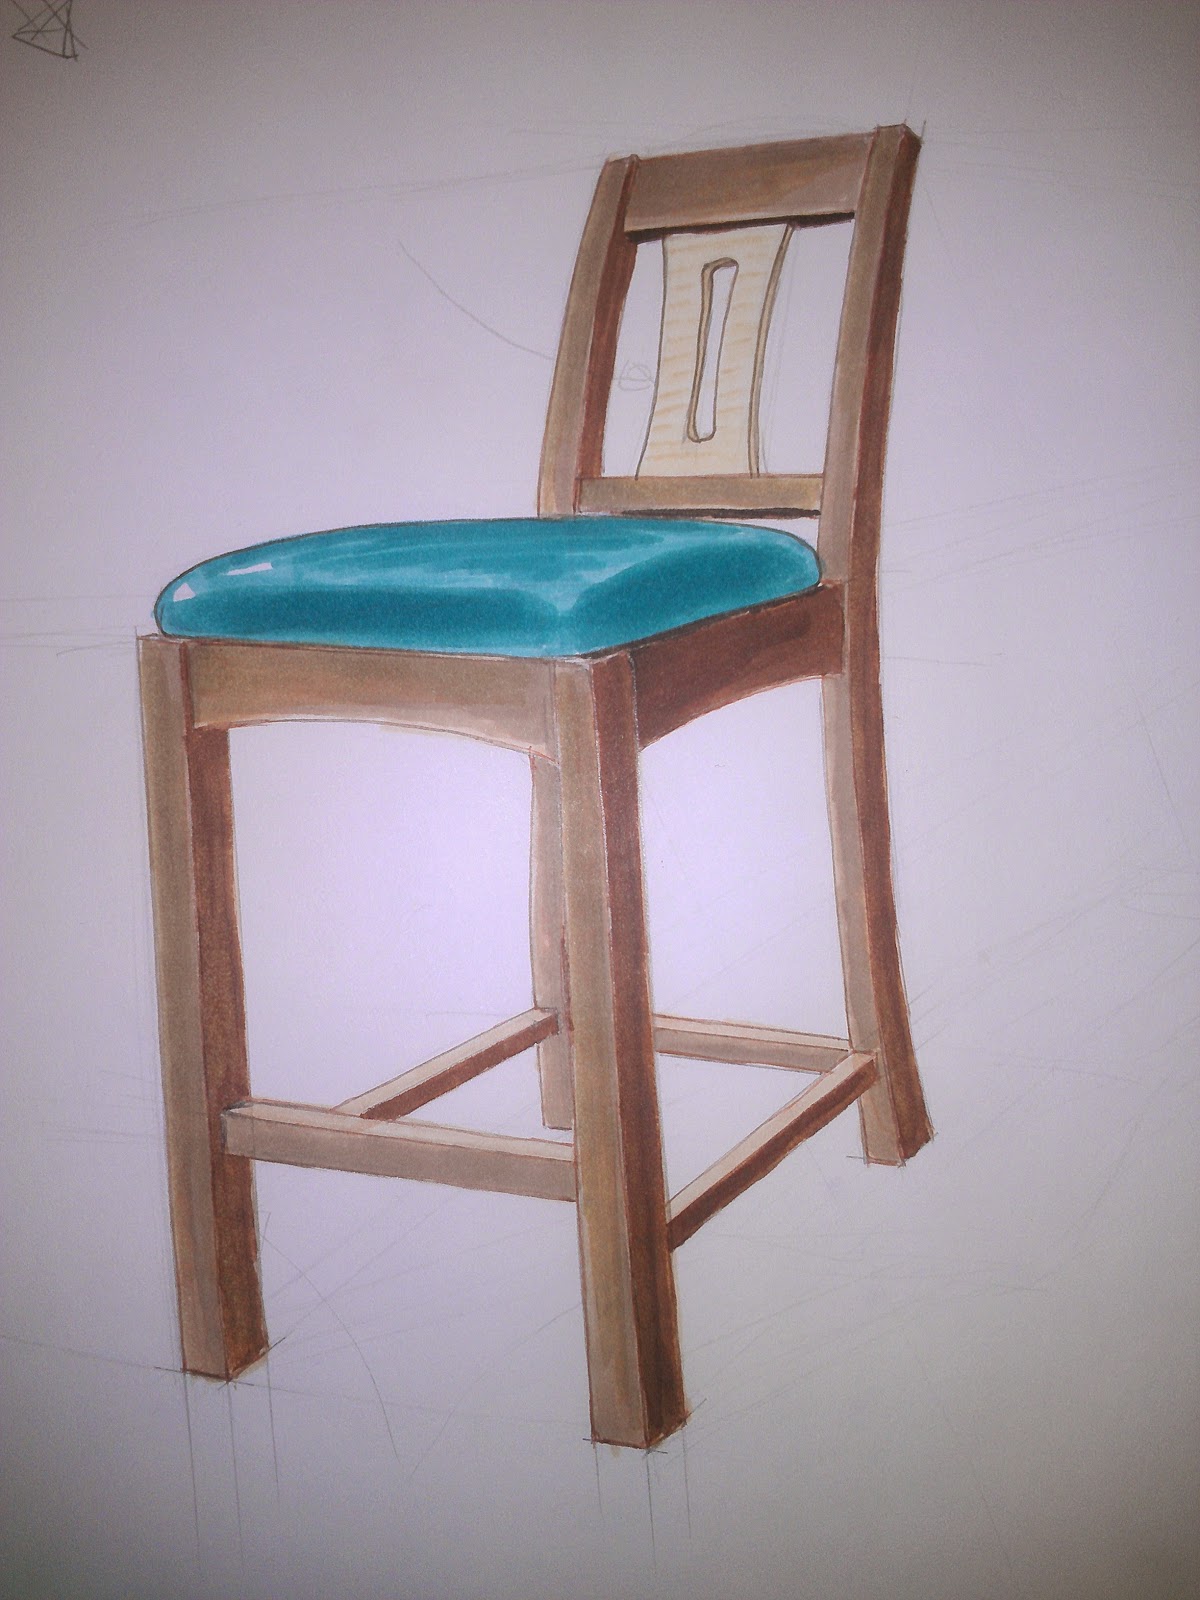
Tonight's sketch is a low back, bar height chair.  I tried to capture the major steps in the process that I've been using.  This has changed dramatically in recent weeks and will surely continue to evolve.

Cherry with tiger maple back splat, and green upholstery because that's the only non-wood-tone color I have at the moment.


I start by ghosting in my perspective lines and the general outlines of the chair.  A 2 point perspective seems to work well for furniture.  Focusing more on getting the initial layout for the perspective right makes a big difference in the over feel of the final drawing.


Next I switch a softer pencil and start to darken the lines that I want to work with.


Next I will refine the outlines with a pen, in this case with sepia ink.


Outlines complete, note that I only lay in lines that delineate sharp transitions.  The seat cushion is only outlined with no lines for the soft edges.


Now I choose my color pallet. For each color I like to have at least three tones, highlight, mid-tone and shadow.  With the alcohol based markers it is possible to blend the three to get most tones in between as needed. 


Starting with the lightest marker in the set I block in that color and then start working on defining the mid tones.


Then the shadowed areas.  Within a given region there will be variations in tone and by creating as much contrast as possible, you can reinforce the shape of the piece.


With the frame filled in I tackle the back splat and seat.  Leaving some white space on the edges of the seat give the feeling a somewhat glossy surface.  The glossier it is, the more contrast there would be between the highlights and mid-tones on the seat surface.


Next I add in a shadow to help ground the chair. 


My final step is to go over the shadow edges with black ink and the highlight edges with white gel ink.  The white gel ink does a great job of making the seat pop as well. I also added some grain lines with the sepia ink pen.  This is particularly effective on larger expanses of wood. A little more contrast for the shadow and its done.


Thursday, March 20, 2014

Hand Rendering Furniture

On nights that I'm not motivated to head down to the shop I've been doing some sketching to work out designs for future projects and just improve my sketching.  Here are some of the recent sketches.


Something that I find useful is to create sketches of existing designs, this helps to develop my eye for proportions and various design elements that I may want to use.


I tried to capture a bit of my process...seem to have missed some big pieces.  I start with a pretty hard pencil 4H or 6H and lightly sketch in my perspective lines and the basic frame. Sketching lightly allows me to slowly add detail and build up the line weight without having to try and erase.  Instead of erasing lines, just ignore them and darken the ones you want to keep.


These images shows my next step after I lay in all the detail with pencil.  I like to fully ink the sketch to provide nice clean lines.  Lately I have been using some Prismacolor fine line pens to do this as they are light brown ink and provide softer lines than black ink.


I will try and get a series of picture for my marker sequence sometime soon.  I am finally figuring out a good process that gives me Good contrast while conveying the textures and colors of the wood.


I stepped back and spent some time experimenting with rendering different species of wood.  This exercise was really useful.


Here is a rendering of a table design that I've been kicking around for awhile.


I wasn't feeling like dealing with the markers last night so I created a series of smaller thumbnails for sideboards.  For me, drawing out the various designs help me understand what aspects of them I like and those that I don't.